
Why Make Your Own Bubble Juice?
Making custom bubble solutions for your automatic machine is cheaper, more fun, and lets you tune bubbles for size, longevity, or Instagram-level sparkle. This guide gives safe, machine-friendly recipes, tests, and storage tips so your machine keeps blowing perfect bubbles.
What You'll Need

DIY Bubble Solution: Simple, Perfect Bubble Mix
Choose the Right Base: Water and Soap
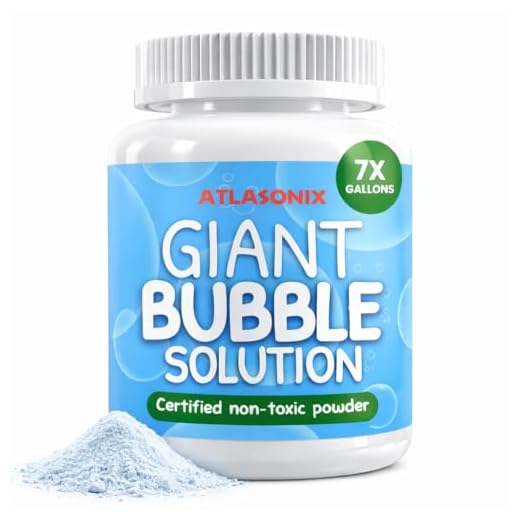
Water makes or breaks bubbles — use the good stuff. Want longer life? Don’t skimp.Start with distilled or filtered water; minerals in hard tap water shorten bubble life and leave scummy residue. Pick a mild, grease-cutting liquid dish soap (Dawn, Fairy) and avoid antibacterial or fabric-softener blends that destroy films.
Use a gentler baby shampoo if you need low-irritation bubbles, but expect weaker bubbles — like a polite soap bubble that apologizes for popping. Keep fragrances minimal; heavy perfumes destabilize films.
Follow these quick rules:
Aim for a higher water-to-soap ratio than handheld wands so the solution flows through your automatic machine without clogging.

Measure and Mix Like a Pro
Measuring cups and patience beat guesswork. Seriously—your machine will thank you.Work in a clean, calm area and gather a jug, measuring cup, a spoon, and a fine mesh or coffee filter.
Measure precisely and follow these starting proportions:
Add the soap to the water slowly while stirring gently. Stir in a steady circular motion and avoid vigorous whisking that makes foam.
Warm glycerin or corn syrup slightly and then blend it in for easier mixing (think warm honey, not lava).
Let the batch rest for several hours or overnight so tiny bubbles collapse and the surface tension stabilizes—like letting dough relax.
Strain the solution through a fine mesh or coffee filter before filling the machine to remove suds or particulates.

Boost Strength: Glycerin, Corn Syrup, and Polymers
Want super-long bubbles? Meet glycerin — the unsung hero. Polymers are the secret sauce for film toughness.Add glycerin conservatively: 10–40 ml per liter (about 1–4%) to slow evaporation and make films more elastic.
Substitute corn syrup at similar proportions but expect a slightly stickier residue on wands and machine parts.
Dissolve water-soluble polymers (xanthan gum or CMC) by making a 0.02–0.1% pre-mix in warm water and allow full hydration before use.
Hydrate fully, then add soap gently to avoid foam and excessive viscosity.
Test small batches in your machine and observe flow and bubble life.
Beware: too much thickener will gum up automatic pumps and nozzles. Balance is key—enough additive to lengthen bubble life but not so much that the machine chokes or the solution becomes sluggish.
Test and Tune for Your Machine
Don't ruin the party — test batches first. Small tweaks give big bubble wins.Make a small test batch (about 250–500 ml) and run the machine for a few minutes in a controlled space. Run near a sink or tray — things will get bubbly.
Observe closely: bubble size, longevity, and whether the machine spits foam or sputters.
Add or adjust as needed:
Note ambient temperature and humidity — bubbles love warm, humid air. Keep a notebook of ratios, temperatures, and results so you can reproduce winning mixes.

Troubleshooting Common Problems
Bubbles pop too fast? Here's the fix — five quick hacks you’ll actually use.Don’t cry over popped bubbles — try these quick fixes with a smile.
Storage, Safety, and Scaling Up
Store smart, stay safe, and make gallons without chaos. Labeling and lids are surprisingly heroic.Store bubble mixes in airtight, labeled bottles away from heat and sunlight — use PET or HDPE jugs for gallons. Test a small jar after storage; if it smells or looks cloudy, discard.
Label containers with date and recipe. Add a tiny amount of household preservative (follow the product label) or refrigerate to slow microbial growth — think of it as spa care for your bubbles.
When scaling to gallons, multiply ingredients proportionally but mix in stages (e.g., combine 1–5 L at a time) to avoid foaming; use a slow‑fold industrial mixer if available.
Keep solutions out of reach of kids and pets; rinse skin or eyes with water immediately after contact. For cleanup, flush the machine with plain water after each use and perform periodic deep cleans to prevent buildup. Consider eco‑friendlier soaps and dilute large volumes into wastewater slowly.

Ready to Make Magic?
Experiment with small batches, keep notes, and tweak glycerin and polymer levels to suit your climate and machine; with patience you’ll get consistent, picture-perfect bubbles. Give it a try, then share photos and tips and celebrate so everyone can glow.


Loved this guide — super thorough!
I tried the glycerin + water + Dawn mix from section 3 and my backyard bubble machine finally makes bubbles that actually last a few seconds before popping. The testing tips in section 4 were clutch; adjusting the dilution by 5–10% made a huge difference for my machine’s nozzle.
Two things I wish the article had: a quick chart for ideal soap % by machine type, and an explicit note about hard water (I had to use distilled).
Thanks for the step-by-step, will def try the polymer tip next weekend 🙂
Nice! I had the same issue with hard water. Distilled made the difference for me too. Also, a funnel helps when adding glycerin so it doesn’t stick everywhere 😂
One more tip: if you want a quick chart, try 2–4% soap for most machines, then 0.5–1% glycerin or 1–2% corn syrup as starting points. I’ll work on a visual chart for the article.
Thanks for the feedback, Sophie — great to hear it worked! Good call on hard water, I’ll add a note about using distilled or softened water for best results. If you try the polymers, start with low concentration (0.05–0.1%) to avoid foam buildup.
Pretty solid write-up. A few constructive bits:
1) The troubleshooting section was helpful but could use an infographic for ‘no bubbles vs weak bubbles vs foam’.
2) For polymers you mention PVA and PEG — could you give brand examples or safe concentration ranges? I tried PEO once and it gummed up the machine at 0.5%.
3) Scaling up: any notes on shelf life once you add glycerin or polymers? I need to make ~10 L batches for an outdoor festival and can’t afford it going bad.
Overall, appreciated the safety notes in section 6 — those are easy to skip but important.
Thanks for the detailed suggestions. I’ll add an infographic for troubleshooting. Regarding polymers: PEG-400 and low-MW PVOH (PVA) are commonly used; start at 0.05–0.2% to avoid gumming. For shelf life: with glycerin only, properly stored (cool, sealed) mixes can last weeks to months; with polymers, shelf life varies — run a small stability test for 1–2 weeks before scaling. For 10 L batches, I recommend making two 5 L test batches first.
We’d welcome that checklist as a guest comment or feel free to submit it and we’ll link it in the article for event planners. Appreciate your input!
Owen — I run fest setups and can confirm: 0.1% polymer, chilled storage, and occasional stirring every few days kept things stable. Also keep a spare 1L backup mix on hand.
Awesome, filtering is a great tip — saved me a repair last time. If anyone wants, I can share my festival checklist for bubble station setup.
One more practical tip: filter the mix through a fine mesh (100–200 micron) before filling machines to catch any polymer clumps that could clog pumps.
Short and sweet — I appreciated the storage and safety section. Kept my DIY batch labeled and away from pets. Quick q: is it okay to reuse the mix after 3 days if stored in a sealed container?
I reuse within a week sometimes — just filter and top up with a tiny bit of soap/glycerin if it looks weak.
If stored sealed and refrigerated, most mixes are fine after 3 days. Give it a quick visual check (no mold, separation) and stir gently before use. If it smells odd or foams excessively, discard and make fresh.
Good article. I’m curious about soap choices — you mention liquid dish soap but not brands beyond Dawn. Does using a cheaper store brand change the bubble quality much? Also, how does water temperature affect mixing and final performance?
Thanks — handy tips. Any idea how hard water specifically affects the polymer additives? Thinking about scaling up for an event.
Great questions. Brand matters mostly in terms of additives: dyes and heavy fragrances can reduce bubble strength. Dawn and Joy tend to be consistent, but many store brands work fine. For temperature, slightly warm water (around 30–40°C) helps dissolve ingredients and mix evenly, but let it cool to room temp before testing in the machine.
I used a supermarket brand once and bubbles were smaller and popped faster. Switched to a ‘pure’ castile soap batch and got better results. Worth experimenting with a small test batch first.
Hard water can cause polymers to clump or be less effective because of mineral ions; chelating agents or using softened/distilled water helps. For events, do a 1L pilot batch first and run a machine trial 24 hours before the event.
Ha, I made the ‘corn syrup’ll fix everything’ mistake 😂
Ended up with sticky handprints everywhere and my kid refused to touch the bubbles. Lesson learned: measure carefully and maybe use glycerin if you want less mess. Also, minor typo in step 2 — ‘meassure’ 😉
Thanks for catching the typo — fixed! Corn syrup does add stickiness; glycerin is usually less tacky and works well for kid-friendly setups. You can also rinse hands with mild soap after play to remove residue.
Story of my life lol — sticky kids and sticky floors. I mix 50/50 glycerin and water for the kids’ parties, no sticky issues and bubbles still durable.