
Begin Composting Without the Drama
Ready to turn kitchen scraps into black gold without backyard wizardry? Composting can divert up to thirty percent of household waste, and worms eat half their body weight daily. This friendly no fail guide makes starting easy, fast, and fun.
What You Need (Spoiler: Not Much)
Bin or pile space, kitchen and yard scraps, browns (leaves, cardboard), water, pitchfork or shovel, thermometer (optional), gloves, and patience — no fancy gear, just consistency.

Beginner’s Guide to Easy, Effective Composting — Start Today
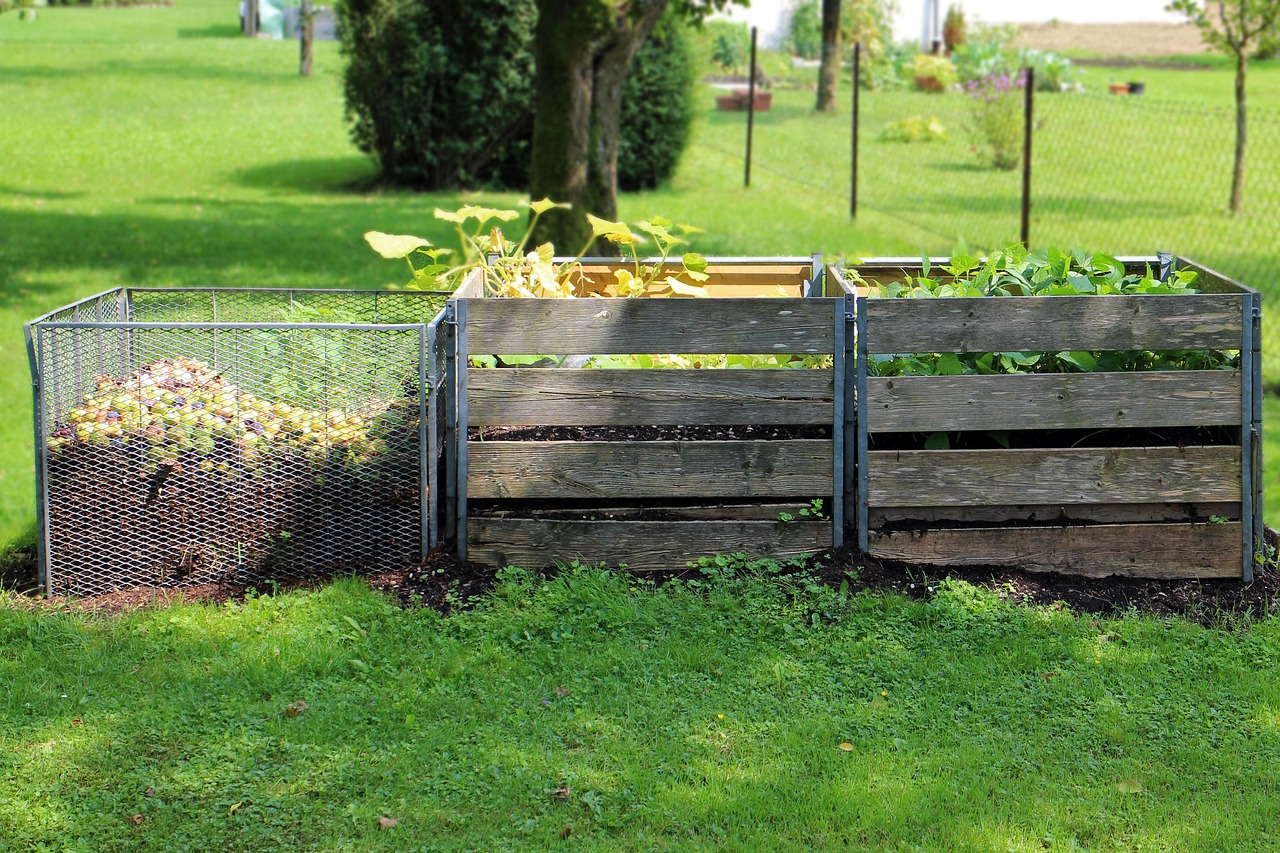
Choose Your Composting System
Worms, tumblers, or straight-up pile — which composting personality matches yours?Pick a method that matches your space, schedule, and patience. Choose a worm bin or tumbling composter for balconies and fast, tidy results. Choose a stationary bin or open pile for backyards that need volume and low cost. Try bokashi for nearly no-effort anaerobic pre-composting you can later bury.
Consider these quick points before you buy or build:
Start small and commit for a season; expanding a working system is easier than shrinking a cold, oversized pile. Cover fresh food scraps with brown material, keep the pile damp like a wrung-out sponge, and ask neighbors for feedback politely.

Build the Perfect Pile
Greens vs Browns: your pile’s love story (and how to keep it from breaking up).Start with a 3:1 ratio of browns to greens by volume to avoid soggy, smelly compost. Think of browns as the dryer “lungs” and greens as the nitrogen-rich fuel.
Layer your pile: Begin with a coarse brown base to promote airflow, then alternate green and brown layers. Chop larger items or run scraps through a food processor—smaller pieces decompose faster (pro tip: I toss onion skins and stalks into the blender when I’ve got a batch).
Moisten each new layer so the pile feels like a damp sponge — not dripping wet. If it smells or gets soggy, add more browns and turn the pile to aerate. In cold climates, make a larger pile and insulate with extra leaves to hold heat. Label meat and dairy off-limits unless you have a heated system. Avoid diseased plants and invasive weeds. Keep a small compost journal weekly.

Manage Heat, Moisture, and Airflow
Want fast compost? Heat is the secret — are you ready to babysit a thermal tantrum?Monitor moisture, temperature, and airflow so decomposition proceeds steadily.
Use a probe thermometer to check for 120–160°F (49–71°C) during active thermophilic breakdown — optional, but helpful; feel warmth or steam on cool mornings if you skip the gadget.
Add water when the pile feels like a dry sponge; add more greens or increase pile size if it never warms.
Turn the pile every 1–2 weeks to reintroduce oxygen, speed heating, and help destroy weed seeds and pathogens.
Add plenty of browns and turn immediately if the pile smells like rotten eggs — that’s anaerobic; don’t audition for “neighborhood skunk.”
Avoid overcompacting: tuck in bulky materials (straw, twig layers) and poke a fork through the pile occasionally to keep air channels open.
Cover the pile with a tarp in wet seasons to prevent waterlogging; water in thin layers during drought to moisten evenly.
Speed up composting by shredding materials finer, turning more often, and monitoring temperature for active phases.

Troubleshoot Common Problems
Smells, flies, and freeloading rodents — here’s the smackdown plan that actually works.Smell the pile and act fast.
Identify a sour, rotten odor as anaerobic: add dry browns (leaves, shredded cardboard), turn or fluff the pile, and reduce wet kitchen scraps.
Add leaves or shredded paper when the pile smells like ammonia — that means too many greens (grass clippings, fresh veggie scraps).
Bury sweet food scraps to stop fruit flies.
Seal banana peels and melon rinds in a freezer bag until bin time, or use a closed bin and bury fresh scraps under a layer of browns.
Use sturdy containers and block access to keep rodents away.
Choose metal or heavy-duty plastic bins with tight lids, cover vents with fine mesh, and avoid meat, bones, and oily foods.
Accept white mold but watch for trouble.
Ignore white, fuzzy fungus — it helps. Worry if you see persistent, brightly colored fungal mats; remove contaminated material.
Check temperature when the pile won’t heat.
Verify pile size (make it bigger), moisture (damp sponge), and nitrogen (add greens). Try a layered hot compost method, a compost accelerator, or add finished compost to inoculate microbes.
Record fixes that work for your climate and celebrate small victories.

Harvest, Cure, and Use Your Compost
Black gold unlocked: how to turn finished compost into garden fireworks (without burning your plants).Harvest finished compost when it’s dark, crumbly, and smells earthy.
Let hot piles cure for 1–2 months after active heating to stabilize nutrients and cool down.
Screen the compost with a 1/2″ mesh and return large pieces to a new pile or reprocess.
Use the screened material right away — try these common applications:
Avoid applying unfinished compost directly to seedlings or sensitive plants because it can tie up nitrogen.
Store cured compost in a dry, covered spot to preserve microbial life and prevent nutrient leaching.
Bag small amounts for convenience or keep larger stocks in covered bins, and share excess with neighbors or use it to attract worms into beds.

You’ve Got This (And So Does Your Garden)
Start small, balance greens and browns, and be patient — composting is a fun experiment. Try it this season, then proudly share your results, and help your garden (and neighbors) thrive!


Short and sweet: this guide got me to actually compost instead of pretending. Pro tip — start a small ‘kitchen scrap jar’ in the freezer to avoid fruit flies. Dump into the bin when you’re ready.
Yes! I do the same. Also, keep a tight lid on your indoor container and clean it periodically.
Great tip, Marcus — freezing scraps is a clever hack for fly control. Appreciate the share.
I appreciated the heat-management tips. For the engineers out there: thermophile activity kicks in around 40–70°C (104–158°F), which is ideal for pathogen kill-off. The guide’s note on pile size affecting heat retention is spot on — too small and you won’t hit thermophilic temps.
A few practical pointers from my trials:
– Aim for at least a 3x3x3 foot pile for hot composting.
– Use a moisture meter or squeeze-test (handful should feel like a wrung-out sponge).
– If temps spike too quickly, turn to cool and redistribute for uniform decomposition.
Would love to see a short section on how to insulate piles in winter without smothering aeration.
Excellent technical detail, Bradley — thanks. We’ll expand the winter-insulation part and include your size recommendation. The 3x3x3 baseline is perfect for readers wanting hot composting outcomes.
Haha — gloves and caution advised! We’ll add a short note on safe temperature handling.
Mind blown. I had no idea about the temp ranges. Is a simple meat thermometer OK for checking pile temps?
I used an old grill thermometer once. Ended up with scorched gloves when the pile hit 150°F. Oops 😅
Yep, a long probe meat thermometer works fine, Hannah. Just make sure it’s long enough to get to the center of the pile.
I followed the “Harvest, Cure, and Use Your Compost” section last fall and finally used my cured compost this spring — game changer. A few specifics for folks trying it for the first time:
1) Screening: I used a 1/2″ hardware cloth and got a beautiful crumbly product.
2) Curing: let it sit for at least 1 month after the active hot phase — plants seemed to love the matured stuff.
3) Application: I mixed 1:4 compost to potting mix for seedlings and top-dressed my veggie beds with a 1-inch layer.
Would love to hear other ratios people use for different plants (roses, tomatoes, houseplants?).
Lovely summary, Olivia — thanks for sharing your exact ratios. For heavier feeders like tomatoes, a 1:3 compost-to-soil mix in planting holes and a 2-3 inch top-dress mid-season works well. Houseplants usually prefer lighter mixes — use 1:5 or less to avoid waterlogging.
For roses I do a mulch/top-dress of 2 inches in spring and again mid-season. They absolutely love the boost.
Good points — I did cure mine for longer to be safe. Thanks for the ratios, everyone!
For seedlings, I actually prefer a sterilized seed-starting mix with a small percentage (10-15%) of finished compost to avoid potential pathogen issues if your compost wasn’t fully hot-cured.
This is probably a dumb question, but are there composting rules in cities? I live in an apartment complex and don’t want to break any HOA rules.
Thanks both! Bokashi sounds promising. Anyone have tips for worm bin starters?
Not dumb at all — rules vary a lot. Some city ordinances allow small compost bins, some HOAs restrict outdoor piles. Start by checking local municipal websites or HOA docs. Indoor bokashi or small vermicomposting bins are good apartment-friendly options.
Check with building management too. I got permission to keep a small worm bin in a basement utility room. It was surprisingly easy once they saw it was odor-free.
I found the troubleshooting section super practical. My first pile went anaerobic and turned into a soggy mess. The bullet list on fixing smell + layering was clutch.
One comment: maybe add a quick table or checklist for “Is my pile too wet/dry/hot/cold” with actions? Would’ve been handy to print and stick on my compost bin.
That would be awesome, Bradley — readers would love a visual. If you share the pic, I’ll link to it in the troubleshooting section (with your permission).
Thanks, Samir — that’s a solid suggestion. A printable checklist makes sense for beginners. I’ll add a simple decision flow in the next update.
Agreed. I taped a small index card to my bin with ‘If stink -> add browns. If frozen -> be patient.’ 😂
I actually made a laminated cheat-sheet with temp ranges for hot composting. Helps me know when it’s time to turn. Happy to share a pic if anyone wants it.
So you’re telling me I can make dirt from my avocado obsessions? Sign me up. Also, will the neighbors notice my composting hobby? Asking for a friend 😂
Neighbors will only notice if you start a banana peel bonfire. Keep it covered and tidy and you’re good.
Yes, avocado peels are fine — just chop them up and balance with browns. And no, a properly managed bin shouldn’t be noticeable. Smell means something’s off, which the guide covers.
This guide made me feel like a compost superhero. Also, tiny confession: I accidentally grew a small mushroom farm in my pile once. It was… unexpected. Are mushrooms good or bad in compost? 🌱🍄
Mushrooms in compost are usually saprophytic decomposers — they’re breaking down material and are generally harmless. They often appear in cool, damp, woody piles. Not a problem unless they’re a fungus you don’t want in your garden.
Omg I had the same thing! Leftover logs gave me a shiitake surprise, lol. I just moved the pile and let it dry a bit.
Whew ok cool. I almost named them and started charging admission 😂
Quick q: does this guide assume you can put meat in? I hate wasting food but also don’t want a raccoon rave in my backyard 😅
Great question! For beginners, avoid meat and dairy — they attract pests and slow down the process. If you want to compost meat, you’d need a well-managed hot system or a bokashi/industrial setup.
Yep, no meat in regular backyard piles. Bokashi is a good workaround — ferments stuff so it’s less smelly, then you bury it or add to a hot pile after.
Loved this guide — super approachable! I started a tumbling composter last spring and it took a little trial and error, but the “Begin Composting Without the Drama” section really would have saved me weeks of guessing.
Couple notes from my experience:
– Brown stuff: don’t underestimate shredded cardboard. It saved the day during heavy veggie weeks.
– If your pile smells, aerate and add more browns, just like the guide says.
Thanks for making composting feel doable 😊
Nice! I bought a tumbler too but keep overfilling it. How often do you turn yours?
I turned mine every 3-4 days during the active phase, Ethan. Less often once it started to cure. Don’t stress if you miss a turn though — it recovers.
So glad it helped, Maya! Cardboard is an underrated hero. If your tumbling bin gets soggy, a layer of dry cardboard or straw around the core helps drain excess moisture.