
Grow Together: A Tiny Garden, Big Family Fun
Ready to grow food that beats grocery store limpness in a week? Microgreens sprout in as little as five to fourteen days, are nutrient-dense, and require almost no space—perfect for impatient kids and overworked parents. This simple, low-cost microgreen kit turns a windowsill into a tiny farm where everyone helps, learns, and eats the results.
This guide walks you through planning and shopping, picking seeds, assembling containers and media, and easy step-by-step growing. You’ll get maintenance tips, safety tweaks, and quick troubleshooting plus playful family activities and simple recipes. Expect hands-on bonding, curious questions, and possibly seedlings outpacing your houseplants’ gym membership—bring snacks and a watering can. It’s easy, messy in the best way, and surprisingly rewarding for all ages.


Beginner Microgreen Kit: All-in-One Winter Growing Pack
Why Microgreens Are a Perfect Family Project
Quick wins and big nutrition
Microgreens are the instant-gratification of gardening: many varieties are ready in 5–21 days. Radish and mustard can surprise you in under a week; broccoli and beet usually take a little longer. Studies show microgreens often pack several times the vitamins and antioxidants of their mature counterparts, so a tiny handful can really boost a kid’s plate.
Small space, small time, big learning
You don’t need a yard or a weekend to care for these. A sunny windowsill or a 10×20 tray fits easily on a counter. Daily care can be a two-minute ritual (spray, peek, talk to the seedlings if you must). Practical tips:
Teach cause-and-effect without drama
Microgreens are forgiving: overwatered trays? Let them dry a bit; leggy seedlings? More light. Kids see quick results—plant, water, sprout—so they learn responsibility and scientific thinking (what happens if we water more/less?). One family I know set a “harvest calendar” and the kids loved counting down to snip day.
Built-in family routines and fun
Microgreens slot into mealtime (“pick your salad topping!”), snack time (tasting sessions), and rainy-day projects (tray decorating and seed-labeling). Assign easy roles—keeper of the spray bottle, record-keeper, or taste-tester—so everyone participates and no one feels left out. And rest easy: seedlings rarely file complaints about sibling squabbles.
Next up: how to choose the perfect microgreens and seeds for your crew—flavor, speed, and kid-friendly picks.
Pick the Right Microgreens and Seeds for Your Crew
Kid-friendly variety cheat sheet
Pick seeds by flavor, speed, and texture so mealtime battles become taste tests instead of tug-of-war.
How much seed for a tray (practical how-to)
Aim for full surface coverage rather than exact counts. For a standard 10×20 tray:
Seed quality and buying tips
Always choose untreated seeds labelled for microgreens or sprouting. Certified organic is a good call because you’re eating the whole plant—look for suppliers like True Leaf Market, High Mowing, or Johnny’s Selected Seeds for reliable lots. Avoid seeds treated with fungicides.
Single vs. mixed packs & picky-eater strategies
Single varieties teach kids to notice flavor; mixed packs make salad bowls a surprise party. For picky eaters, stick to mild options (pea, sunflower, broccoli). For adventurous toddlers, introduce spicy ones (radish, arugula) in tiny amounts or mixed with milder leaves.
Spark curiosity
Label trays with silly names—“Sir Sunflower Crunch” or “Captain Pepper-Burst”—and let kids decorate. It’s amazing how stickers and a goofy name can turn a nibbler into a proud harvester.
Assemble the Microgreen Kit: Containers, Media, and Gear
Essential supplies (family-friendly, budget-aware)
Media: coconut coir vs potting mix vs hydro mats
Extras & safety pointers
Shopping tips & assembly checklist
Make it playful for kids
Step-by-Step Family-Friendly Growing Guide
Stage 1 — Prep trays & media (Day 0)
Wipe trays clean, add a 1–1.5 inch layer of moistened coir or potting mix (squeeze test: it should hold shape but not drip). Label trays with seed name and date — kids love stickers for this.
Stage 2 — Sowing seeds (Day 0)
Kid-safe measuring tip: pour seeds onto a paper plate and let each child sprinkle over a marked grid or use teaspoons for small batches.
Stage 3 — Watering: soak vs. mist
Gently press seeds into media, then mist thoroughly with a spray bottle until media is evenly moist. For dense trays, cover with a dome or a second tray and mist the top daily. Only soak large-seed trays before sowing; small seeds rarely need pre-soaking.

Stage 4 — Covering & darkness (Day 0–3)
Many microgreens like a short dark period to jumpstart roots. Cover for 2–4 days (radish and arugula: 2–3; broccoli, kale: 3–4). Check daily — uncover if mold appears or if sprouts push up against the cover.
Stage 5 — Daily care & light placement (Day 3+)
Stage 6 — When to harvest & how (Typically Day 7–20)
Troubleshooting (quick sidebar)
Kids learn fast — and so do seedlings. Next up: simple maintenance and safety tips that keep your tiny roommates thriving.
Maintenance, Safety, and Troubleshooting Made Simple
Keep trays fresh between cycles
After harvesting, wash trays with hot, soapy water and a splash of white vinegar or a mild bleach solution (1 tbsp bleach per gallon) to kill lingering spores. Let everything dry fully — damp trays are mold hotels. For durability and easy cleaning, try a sturdy starter tray like the Burpee 36-Cell SuperSeed Reusable Starter Tray which holds moisture well and rinses clean without warping.

Simple family-safe hygiene
Teach a quick “pre-harvest pep talk”: wash hands, tie back hair, and keep curious pets off the counter. Store seeds, scissors, and sprays in a high bin or a labeled tote with childproof lids so kids know what’s for playing and what’s not. Consider a small caddy for tools (cheap plastic sorter or an Ikea VARIERA) so everything has a home.
Quick fixes for common problems
Salvage vs. start over
If >25% of tray is moldy or smells sour, toss it — health first. If issues are localized or only a few seedlings are thin, snip the bad parts and often the rest will rally. Remember: one failed tray is not a failure — it’s a garden blooper badge and a perfect story for the next planting day.
Keep a relaxed attitude and let kids lead a “science detective” inspection next time — troubleshooting is half the fun.
Make It Fun: Activities, Recipes, and Learning Games
Kid-Friendly Recipes (fast wins)
Turn tiny greens into big flavor with simple, speedy recipes kids can help make.
Quick tip: always rinse microgreens and let kids assemble, not handle knives.
Sensory & Craft Activities
Play up touch, sight, and smell: create a “sensory tray” with labeled samples (soft pea shoots, peppery arugula) for tasting and smelling. Do a color-and-texture comparison chart: kids draw leaves, rate softness, and give each one a silly name.
For crafts, let kids decorate trays with non-toxic paint or waterproof stickers, make plant markers from painted popsicle sticks, or craft kid-sized scoops from wooden spoons (sand smooth, paint, seal).
Educational Games & Journaling
Turn daily care into mini-projects that teach science and decision-making.
Set up a “mini farmer’s market” at dinner: kids price tiny sample cups and “sell” to adults (use play money). It’s a crowd-pleaser and builds confidence.
With these playful prompts—recipes, crafts, and games—you’ll keep curiosity bubbling and create memories as the little leaves grow. Use them to carry your family into the final wrap-up of the article.
Small Leaves, Big Smiles
A homemade microgreen kit is an affordable, low-stress way to bring families together, teach kids about food, and enjoy fresh flavor at home. Start small: one tray, a couple of seed types, and simple tools. Expect hiccups—mold, thin sprouts, or unpredictable tastes—and treat them as learning moments. Celebrate tiny victories like the first snip or the kids’ proud plates.
Gather supplies this weekend, plant that first tray, and make it a family ritual. These tiny greens come with big rewards (and fewer chores than a pet), so have fun and grow together. Share the joy today!


Short and sweet: loved the family activities section. The scavenger hunt idea for learning plant parts had my kids giggling. Would be nice to have printable scavenger cards though — anyone made their own?
Can someone recommend which kit is best for classroom use? I’m a preschool teacher and need something durable and non-toxic. I like the idea of HYPERroots (compostable) but durability is a factor. Any classroom-tested recs?
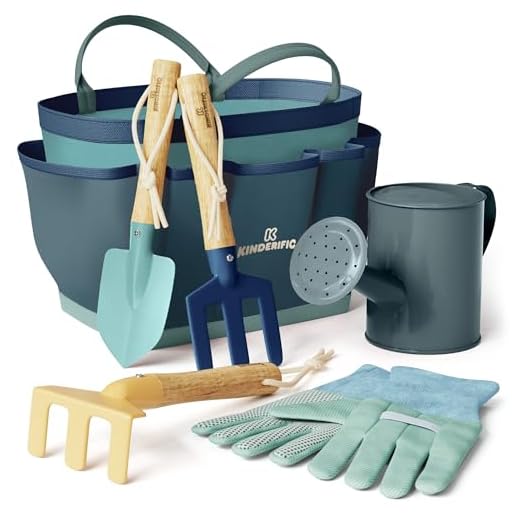
For classrooms I’d recommend the Burpee 36-Cell SuperSeed Reusable Starter Tray for durability and reusability, paired with a GooingTop LED on a timer if you don’t have good sunlight. The Kids Gardening Tool Set is great for little hands — just supervise sharp edges.
Agreed — Burpee or AOMGD for durability. Also label each tray with names so kids don’t mix them up. We use washable markers on the tray edge.
This article is solid but two things bug me: 1) the lighting recommendations felt a bit generic (GooingTop clip-on LED mentioned, but which lumens/watts for a 2-tier setup?), and 2) price comparisons missing. I ended up buying the AOMGD 4-Tier Stackable kit because space is tight in my apartment, but I think the article could help people decide between that and the Self-Watering Microgreens Kit with Bamboo Frame.
Overall: great read, but more data (numbers, shelf life, yield per tray) would make it perfect.
Thanks admin and Grace — the lux numbers help. Henry, how’s the durability of HYPERroots? Compostable sounds great but I worry about leaking or falling apart during watering.
Love the AOMGD for vertical space. I run mine with a cheap timer (6 on / 6 off) and the GooingTop at 10″ — my lettuce mixes looked good. Yield varies but I get around 2–3 oz per small tray.
Price comparisons would be clutch. I picked HYPERroots for the compostable trays (wanted eco-friendly) but it cost a bit more than the non-compostable options.
It’s fine if you handle it gently. I use a tray liner and don’t soak it too much. For kids’ projects maybe ok, but for heavy reuse I’d go with the Burpee reusable tray.
Great feedback, Noah — very practical. For the GooingTop LED, I’d recommend at least 12,000–18,000 lux for microgreens or about 20–30 watts if using full-spectrum LEDs for a 2-tier rack; distance matters too (8–12″ from canopy). I’ll add a small specs section and a simple cost-per-harvest comparison between the AOMGD stackable and the bamboo self-watering kit.
Tried this with my 7-year-old last weekend and we actually had a blast. The step-by-step part was perfect — we used the Burpee 36-Cell SuperSeed tray and it made seeding sooo much easier. A couple of things:
– The kit photos are cute but I wish there was a clearer list of what comes in each product (some Amazon listings are vague).
– If you’re indecisive, start with radish and sunflower seeds — instant gratification.
Will try the GooingTop LED for winter sprouts.
Did you notice any mold issues? I always worry about that with small trays.
We used the Burpee tray too and yep, seeding is way less messy. Also, pro tip: dampen the media slightly before adding seeds — my toddler loved feeling the ‘soft dirt’. 😊
So glad you and your kiddo had fun, Liam! Good tip on radish and sunflower — they’re great for quick results. On product listings: I’ll add a quick comparison table to the article showing what’s included in each kit (e.g., bamboo frame, trays, lights) — thanks for flagging!
My toddler ate a microgreen once (panic!), so I appreciated the ‘Maintenance, Safety, and Troubleshooting’ section. Quick question: are any of the listed seed packs known allergens? I know some folks worry about sunflower seeds and peanut allergies — just trying to be cautious.
We had the same scare — turned out fine, but now we always rinse and taste a tiny piece first. Also keep the Kids Gardening Tool Set in a safe spot so little ones don’t use anything sharp.
Good question, Olivia. Most common microgreen seeds (radish, broccoli, mustard, sunflower) are not the same as tree nut/peanut allergens, but cross-contamination can occur depending on packaging. If allergies are a concern, check the seed supplier’s allergen statements and consider certified allergen-free seeds. Also, supervise tasting with young kids and introduce one type at a time.
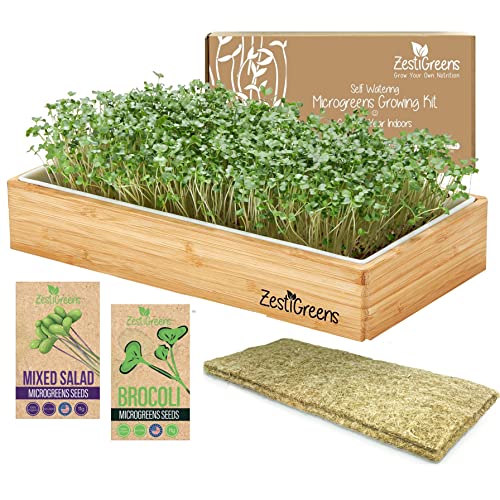
Okay, real talk: the Self-Watering Microgreens Kit with Bamboo Frame looks gorgeous in photos, but who has the patience for self-watering systems that need constant monitoring? I tried one and it saved time but the wick clogged after a month. Maybe I’m doing something wrong 😂
Also, the Bonviee 5-Pack Adjustable Humidity Seed Trays are neat — anyone used them for humidity domes? Thoughts?
I had the same wick clogging issue. Switched to glass wicks and it’s better. Also, pre-soak the wick and run the reservoir with a little hydrogen peroxide (diluted) occasionally to stop biofilm.
If you’re low-effort, go with simple trays and misting. Less stuff to break. The HYPERroots kit is pretty foolproof for beginners.
Thanks all — good tips. I’ll try the peroxide trick and maybe switch to HYPERroots for my next batch.
If anyone wants, I can add a short ‘low-maintenance vs feature-rich’ buyer’s guide to the article comparing maintenance needs of each product.
Haha patience is real. I like the look of the bamboo frame so much I tolerate a little extra maintenance. It’s become a weekend ritual for us.
Thanks for being frank, Ethan — those systems can be finicky. Wicks do clog; cleaning weekly and using filtered water helps. For Bonviee trays: yes, they work well as adjustable domes; use them during germination and remove when greens get light to avoid damping off.
Just a quick shoutout: the Bonviee humidity trays + a simple fan (low speed) prevented mold for me. Also, kids loved the ‘harvest party’ idea — we made tiny salads.
One more thing — add a note about storing harvested microgreens. I pop them in a jar with a damp paper towel and they stay crisp for 3–5 days.
Jar trick is genius. I was just tossing them in a bag and they’d get soggy fast.
We store ours in a glass container with a paper towel and it lasts well for lunches.
Love the harvest party idea! Thanks for the storage tip — I’ll include a short section on post-harvest storage and best-by tips.
Also freeze extras in ice cube trays with olive oil for future sauces — weird hack but works.
Ooh that freezing idea is creative — I’ll add a ‘what to do with extra microgreens’ subsection.
Not impressed with one section — ‘Pick the Right Microgreens’ felt too basic. I grow basil microgreens often and would’ve liked more on flavor profiles and recipe-specific picks (e.g., which microgreens pair best with eggs vs salads). Otherwise the kit assembly photos were useful.
Basil is awesome with eggs. Also try mixing basil and sunflower for a crunchy, herby salad topper.
I’ll add a small flavor-pairing chart and a few simple recipes to the article in the next update.
If you like strong flavors, mustard greens are unbeatable on savory dishes. Agree it deserved a deeper dive.
Great point, Jacob. I can expand that section with flavor notes (peppery = radish/mustard, nutty = sunflower, umami = basil/arugula) and quick pairings for eggs, sandwiches, and smoothies. Appreciate the constructive call-out.
Love the ‘Make It Fun’ section. We turned microgreens into pizza toppings and made a ‘taste test’ game for the kids. Also: the Kids Gardening Tool Set with Tote Bag is adorable and actually useful — my toddler loves carrying the tote around.
One tiny nit: the activity printables could be higher contrast for photocopying.
So fun to hear about pizza toppings! Thanks for the printable feedback — I’ll update the files with a high-contrast version for better printing.
Article was cute but felt a bit long for new parents. I skimmed to the kit assembly and seed choices. Might be cool to have a ‘quick start’ checklist at the top for parents who want to jump right in.
I appreciated the troubleshooting tips. Saved my crop from damping-off last month by lowering humidity and spacing trays out. Quick FAQ: Does anyone have a go-to ratio for seed density? The article gave ranges but I’m always second-guessing.
My current rule: about 1.5–2 tablespoons per standard 10×20 tray for radish, less for bigger seeds like sunflower.
I went heavy once and ended up with weak stems. Thinner sowing = better air circulation, imo.
Nice rule of thumb, Lucas — I’ll add a concise density table to the guide (tbsp per 10×20 tray) covering common seeds like radish, broccoli, sunflower, and basil.
I measure by eye now but started with 1 tbsp for tiny seeds and 2+ for larger. Trial and error is the name of the game.