Why Portable Soldering Kits Make You a Desktop Wizard
Everyone thinks soldering requires a lab coat and a smoke-filled garage—wrong. Portable soldering kits put HOT power in a tiny, safe package, letting you fix headphones, make LEDs blink, or build a tiny robot at your kitchen table.
This guide shows what’s inside a kit (What’s in the Box), whether to buy or build (Buy or Build), how to stay safe without losing your grin (Safety First), fun starter projects (Quick Wins), and maintenance plus clever hacks (Care, Tricks, and Troubleshooting). You’ll get practical tips, shopping advice, and simple projects that reward fast.
Grab your safety glasses, and let’s zap, solder, smile—no smoke alarm required. Ready? Let’s make sparks, not fires.


Soldering Iron Showdown: Pinecil vs MiniWare TS80P vs iFixit FixHub
What’s in the Box: Anatomy of a Portable Soldering Kit
The main tool: iron or pencil — and how it’s powered
Most kits center on a compact iron (a pencil-shaped heater) or a tiny iron with a mini station. Power options matter:
Tips, temp control, and why they matter
Tips are the business end — pointed for tiny joints, chisel for wires. Quality tips are copper core with iron plating. Look for:
Solder and flux — the consumables
Helpers: sponges, helping hands, and small tools
Most kits include:
Safety gear and useful upgrades
Don’t skip:
Spotting low-quality kits — quick tips
Next up: whether to buy one of these ready-made kits or assemble your own—we’ll walk through pros, cons, and a few build checklists.
Buy or Build: Choosing the Right Kit for Your Projects
Picking a portable soldering kit is less about brand loyalty and more about matching tool to task. Think of it as choosing a wand: light and precise for delicate charms, heavier and hotter for dragon-scale armor. Below are practical pointers and a quick decision tree to help you buy or build the wand that won’t betray you mid-spell.
Beginner-friendly: keep it simple, low stress
If you’re doing hobby repairs, learning on PCBs, or building LED necklaces, look for:
Makers and metalworkers: more heat, more control
For thicker wires, small brackets, or larger joints, step up to:
Key features checklist
Decision tree — quick picks
Price-performance reality check
Expect to pay ~$30 for “OK” portability, $60–120 for a kit that won’t make you cry, and $150+ for pro-grade reliability. Spend a little more if you hate rework — good thermal recovery and tip ecosystems save time, frustration, and ruined PCBs.
Safety First (But Keep the Smile): Safe Practices for Home Soldering
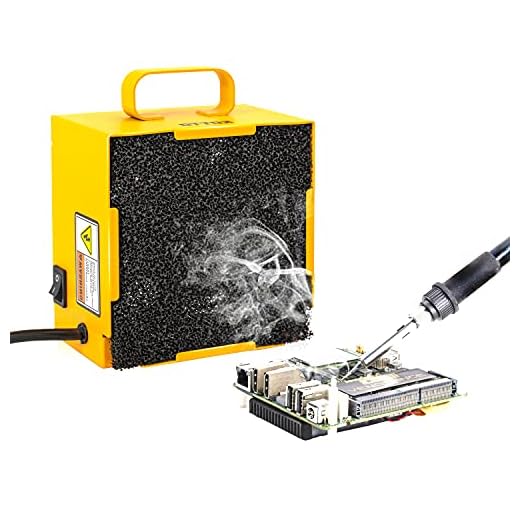
Ventilation & fume extraction — breathe easy, safely
Soldering smoke smells like progress, not perfume. Work near an open window, use a small desk fan to blow fumes away, or — ideally — a compact extractor that pulls fumes at the source. For home use, a tabletop unit with a charcoal + particulate filter does the job.
If you solder often (daily sessions), consider a half‑mask with organic-vapor + particulate cartridges. For occasional hobby work, good airflow and the extractor above usually keep things comfortable.
PPE: what to wear without looking dramatic
A quick anecdote: I wore sunglasses once instead of safety glasses and learned that glare isn’t the only hazard — don’t do that.
Handling hot tips and butane safely
Always assume the tip is molten until proven otherwise. Use a stable stand and brass-wool tip cleaner; never rest a hot iron on paper or plastic. For butane irons: refill outdoors, cool the unit fully, and store spare canisters upright in a cool, ventilated spot (not the attic).
Fire basics for tabletop work
Battery safety for rechargeable kits
Use batteries with built-in protection and the charger the manufacturer recommends. If a battery gets hot, emits odor, or bulges: stop charging, move it to a non-flammable surface outdoors, and monitor — do not puncture. For storage, use a fireproof LiPo bag or metal box.
Child- and pet-proofing your workspace
Close the door, put a baby gate on the workshop door, or at least elevate the station. Park hot irons on their stands and unplug them. Store solder, flux, and fuel in locked drawers or high shelves.
Quick troubleshooting (calm, practical steps)
Keep the mood light, but keep these checks routine — you’ll solder longer, safer, and with more smiles.
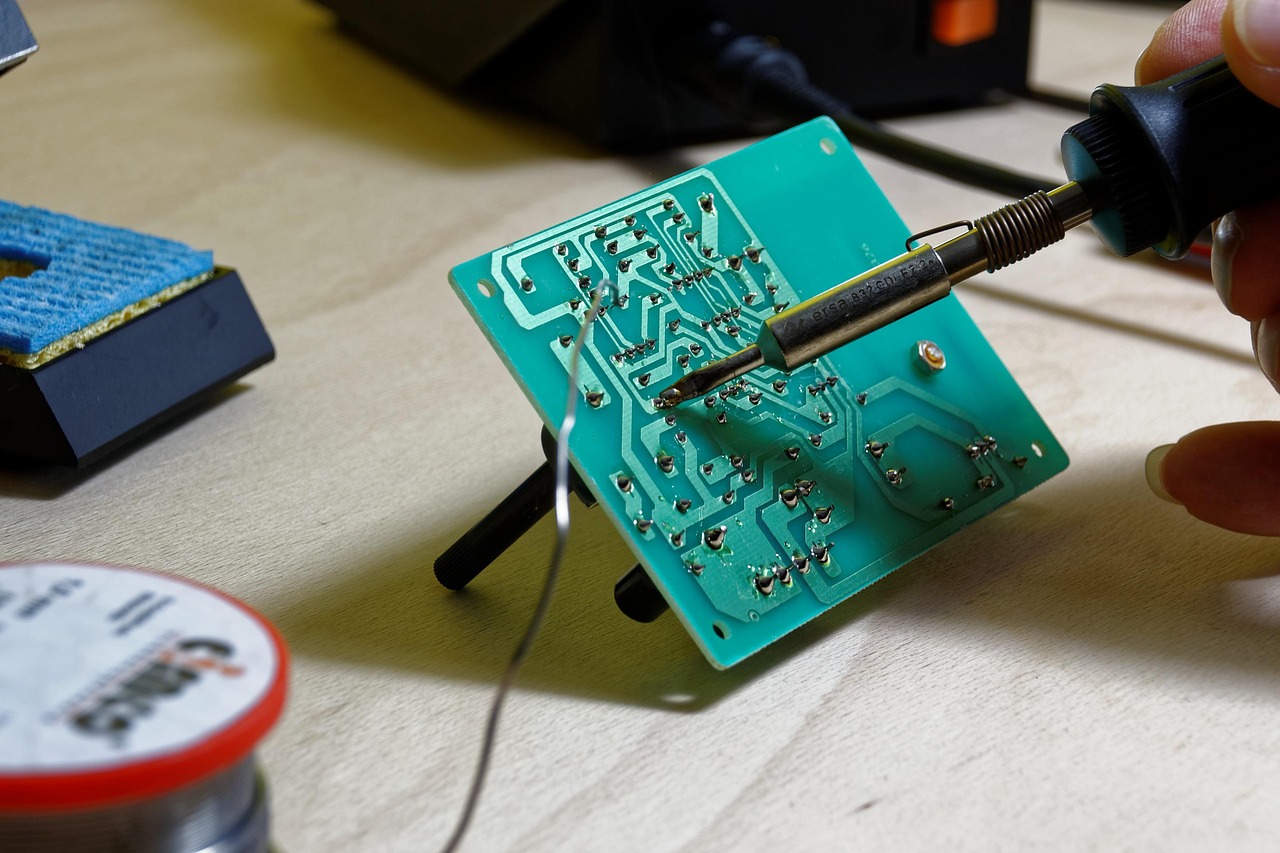
Quick Wins: Beginner-Friendly Projects with Portable Kits
Ready to practice what you’ve learned? These bite‑sized projects fit a pocket iron or butane kit, build confidence fast, and usually end with something that works — or at least looks delightfully soldery.
Repair a phone charger cable
Difficulty: Easy (good first solder).Essential parts:
Steps & watch‑fors: Cut back to healthy wire, tin each conductor, join with a dab of solder, and shrink tubing over the repair. Watch for cold joints (dull, grainy solder) and keep the iron on wires only long enough to wet the joint — too much heat can melt insulation. Test with a cheap phone first.
Solder header pins to a microcontroller
Difficulty: Easy–Medium (steady hands help).Essential parts:
Steps & watch‑fors: Insert headers into a breadboard for alignment, tack one end, then solder each pin in a steady sweep. Avoid overheating the board (lift between pins) and ensure each joint is shiny and conical — a cold joint here can cause flaky serial connections.

Fix broken headphone wires
Difficulty: Easy (tiny wires require patience).Essential parts:
Steps & watch‑fors: Strip tiny insulation carefully, twist and tin stranded wires, solder to the correct plug terminals (L, R, GND), and insulate each channel. Keep heat short; tiny drivers and plastic housings are unforgiving.
Build an LED throwie or wearable badge
Difficulty: Very Easy (instant gratification).Essential parts:
Steps & watch‑fors: Solder short tabs to the LED leads, attach to the battery with the magnet or pin, secure with tape. Don’t overheat the LED (only a second to tack). Wear it proudly at night.
Create a small repairable toy
Difficulty: Medium (creative troubleshooting).Essential parts:
Steps & watch‑fors: Replace broken wiring, solder new connections to motor terminals, and test before reassembly. Watch for overheated motor windings and strip lengths that make neat, secure joints.
Take photos at every step — before, mid-solder, and the triumphant after shot. Share with a friend, tag a maker group, or caption your photo: “First solder, many smiles.” Celebrate wins and flubs alike (a messy first joint is just a story to tell).
Next up: how to care for your kit, clever tricks, and quick troubleshooting so your new skills last longer than the glue on a sticker badge.
Care, Tricks, and Troubleshooting: Keep Your Kit Happy
Every victory soldering a tiny circuit board tastes better when your iron behaves. A little routine care and a few clever tricks extend tip life, improve joints, and stop panic mid-repair.
Tip care: clean, tin, repeat
The tip is your kit’s toothbrush — keep it clean and coated.
Store smart; stock consumables
Keep solder dry, labeled, and accessible.

Butane & battery basics
Treat fuel and cells with respect for reliability.
Replace consumables when…
Swap parts at the first sign of failure: tips that no longer wet, wick that tears, cracked heat‑shrink, or a flaky solder feeder. Cheap tips can save pennies but cost time — upgrade to branded replacements when you solder often.
Troubleshooting checklist (quick fixes)
Quick power diagnostics: measure voltage at the iron input, try another cable or battery pack, listen for click/ignition on butane units, and feel for steady warmth within 10–30 seconds.
Pro tips & community help
Pre-tin stranded wires, use helping-hands or a PCB vise, and add a magnifier for tiny pins. DIY upgrades: swap to a higher-quality chisel tip, fit a spring-style compact stand, or add an anti‑static mat. When stuck, post photos to maker forums (r/diyelectronics, electronics.stackexchange), join a local makerspace, or attend a repair café — trades, spare parts, and a friendly mentor are often closer than you think.
Ready to wrap these habits into your workflow? Onward to the final takeaways.
Zap, Solder, Smile: Your Next Tiny Triumph
Portable soldering kits turn small fixes into tiny victories — approachable tools that let you repair a toy, revive headphones, or prototype a quirky LED badge. Start small, respect the safety basics (ventilation, eye protection, correct tip temp), and enjoy the satisfying click when a joint holds and a gadget springs back to life. Humor helps: a little zap, less drama, more grin.
Pick one simple project, take photos or a short video, and share it with the maker community. Tag your post, celebrate the learning, and inspire someone else to solder their first shiny joint. Then rinse and repeat — each small success builds skill, confidence, and plenty of new ideas.