
Welcome to the Wonderful World of Prop-Making
You don’t need a workshop or a trust fund to build jaw-dropping cosplay props. You need curiosity, a few cheap tools, and the willingness to glue your fingers together (briefly). This guide is for absolute beginners.
We’ll focus on easy techniques, low-cost materials, and tricks that make things look polished fast. Expect foam swords, cardboard shields, PVC builds, and simple paint magic. Safety tips are included so you don’t lose a finger or your dignity.
Aim for fun over perfection. Try, fail, learn, and laugh. If it looks good from three paces and protects your ego at photo ops, it’s a success.
Let’s make something awesome with very little cash and effort today.


EVA Foam Basics: Beginner Cosplay Armor & Prop Tutorial
Getting Started: Tools, Materials, and a Beginner's Mindset
Must-haves vs. Nice-to-haves
Start tiny. Buy the basics, then upgrade when you’re hooked.
Must-haves:
Nice-to-haves:
A compact anecdote: my first foam sword was made with a $7 glue gun and a crooked ruler. It survived a con-pretty-good knockoff battle, and I learned “measure twice” the hard way.
Setting up a low-stress work area
You don’t need a garage. A kitchen table with a drop cloth works fine—just avoid hot glue on grandma’s heirloom. Keep a small bin for scraps, a cup for brushes, and a tray for wet paint. Good lighting and a comfortable chair = fewer mistakes and fewer curse words.
How to source cheap materials
Thrift stores, dollar stores, and Habitat ReStore are treasure troves. Save appliance boxes for structural cardboard. Online marketplaces (Facebook Marketplace, Craigslist) often have leftover foam mats, PVC pipes, or tools. Look for coupons at Michaels or Joann, and use their frequent 40% off coupons on adhesives or specialty foam.
Beginner mindset (the secret ingredient)
Sketch simple plans on paper—stick figures are valid. “Measure twice, cut once” saves time. Embrace mistakes: a ripped seam teaches a better seam. Start with small projects (a dagger, a helmet crest) to practice techniques before committing to a full armor set. Learning by doing is faster and way more fun than over-planning—your fifth build will be noticeably better than your first.
Foam Fundamentals: Easy Weapons and Armor for Instant Impact
Foam is the go-to for fast, light, and convention-safe props. Below are three beginner-friendly mini-projects that teach the core foam skills — planning, cutting, shaping, layering, sealing, and painting — without needing a PhD in prop engineering.
Foam Sword — classic, forgiving, dramatic
- Planning & templates: Draw a simple sword profile on paper; scale to your hand/height.
- Cutting & shaping foam: Trace onto 6–10mm EVA foam (or layer 2–4mm sheets). Cut with an Olfa-style snap-off knife for straight lines and an X-Acto for details.
- Layering for strength: Glue two or three layers with contact cement (Barge or DAP) for a rigid blade. Insert a wooden dowel or ¾” PVC core into a routed channel for a solid, non-wobbly handle.
- Sealing seams: Heat-gun the edges lightly to close cut fibers; use flexible spackle or hot glue to fill gaps.
- Priming & painting: Use Plasti Dip or flexible primer, then acrylics for weathering.
Skill takeaway: creating a simple internal core (dowel/PVC) prevents flex and makes handles reliable.
Basic Shield — big impact, low weight
- Planning & templates: Use a dinner plate or bucket lid as a curve guide; draw pentagon/round shield shapes on paper.
- Cutting & shaping foam: Stack two layers of EVA (6mm + 2–4mm face) and cut with a sharp knife. Heat-form over a bowl for slight curvature.
- Layering for strength: Bond layers with contact cement; add a ring of hot-glued webbing or a foam rib on the reverse for rigidity.
- Sealing seams: Tape the rim with gaffer or fabric tape before priming to protect edges.
- Priming & painting: Spray a base coat, then dry-brush metallics.
Skill takeaway: layered foam + rim reinforcement = a shield that looks heavy but feels featherlight.
Simple Chest/Shoulder Plate — wearable armor basics
- Planning & templates: Measure key points with a friend’s help; make templates from craft paper.
- Cutting & shaping foam: Use 6–10mm EVA for base; heat-gun to curve around the torso, shaping in small bursts to avoid burning/warping.
- Layering for strength: Add decorative ridges with 2mm detail foam glued on top; reinforce attachment points with small inside plates of plastic or thicker foam.
- Sealing seams: Edge-coat with hot glue or flexible filler; test straps and attachment points under movement.
- Priming & painting: Flexible primer + acrylics; add straps and quick-release buckles for easy wear.
Skill takeaway: test fit early and reinforce all stress points — straps break where you least expect them.
Next up: paint, texture, and finishing tricks that make these foam builds read as metal, leather, or bone without breaking your budget.
Cardboard, PVC, and Found-Object Hacks: Make Big Props Without Big Costs
If foam is your comfy sweater, cardboard and PVC are the cargo pants: ugly at first, wildly useful. Want a giant spear, a battered shield twice your head, or an oversized sci‑fi gun that won’t bankrupt you? Cardboard, tubing, and a few thrift-store treasures are the fast lane to “big and believable.”
Big, hollow props with corrugated cardboard
Start with a full-size template (butcher paper or newsprint). Cut panels from single‑face corrugated sheets to keep curves light. Build a box shell or “bookfold” tube and tape the seams on the inside with packing tape; this makes the exterior seam free for detailing. Score the corrugation with a utility knife every 1/4″ to 1/2″ for smooth bends, then layer 2–3 face sheets for strength.
Reinforcing with PVC or wooden dowels
For long weapons or tall standards, a lightweight core prevents flop. Common choices:
Slip-fit joints allow props to break down for travel. Use PVC couplings, friction-fit telescopes, or simple bolts through aligned holes for quick assembly. Wrap the core in foam or packing tape where it meets cardboard to prevent ripping.
Upcycling and disguising seams
Turn bottle caps into rivets, thrifted picture frames into ornate borders, and a broken lamp arm into a perfect sci‑fi spine. Hide seams by converting them into design features:
Travel- and convention-friendly hacks
If your prop-check forbids rigid weapons, make a “demonstration mode” that collapses into a fabric-wrapped stiffener or a non-sharp foam core. For flights, break props into flat panels or remove the internal core and pack it as checked baggage.
Make cheap look expensive
Texture with paper‑mâché, joint compound, or spray‑stone finishes; prime with gesso, then dry‑brush metallics and glaze for depth. Small details—washer bolts, leather straps, and weathering—sell the illusion faster than ornate carving.
Painting, Texturing, and Finishing: Make Your Prop Pop on a Budget
You built the shape — now make it sing. Painting and finishing turn “cardboard-and-hot-glue” into “screen‑ready” (or at least cosplay‑hall‑ready). Quick, cheap techniques give depth and believable wear without needing an art degree.
Priming and cheap paint choices
Priming = insurance. On foam or cardboard, use a watered‑down PVA (white glue) or a dedicated primer: Zinsser Bulls Eye or a coat of Plasti Dip for bendy foam. For paints, acrylic craft paints (Apple Barrel, FolkArt) are cheap, and Liquitex Basics gives stronger pigments. For large flat areas, spray paint (Rust‑Oleum Painter’s Touch) is fast — use light passes to avoid drips.
Brushes, sponges, rags, and masking
Different tools make distinct textures:
Mask clean edges with FrogTape or frisket film; for razor‑sharp borders, use a credit card to burnish paint over the tape edge, then pull while wet for crisp lines.
Faux metals, dry‑brushing, and washes
Layering is your friend:
- Base coat (dark — black, brown, or dark gray).
- Mid‑tone (gunmetal, bronze) with a partial dry brush.
- Highlight with a lighter metallic (silver or bright gold) sparingly on edges.
Dry‑brushing: load a brush, wipe most paint off, then skim edges to lift highlights. For aging, use thinned acrylic “washes” (1 part paint : 4–6 parts water) to flow into crevices, then dab excess away.
Sealants and durability
Finish with a varnish: matte for worn gear, satin/gloss for shiny tech. Budget winners: Mod Podge (for indoor, low‑flex items), Minwax Polycrylic (clear, non‑yellowing), or a spray clear coat (Krylon or Rust‑Oleum). For high‑friction points, add an extra few coats or reinforce with flexible sealers (Plasti Dip) to prevent chipping.
Troubleshooting common finish problems
Small sacrifices — like using spray paint for base coats instead of painstaking metallic layering — save time and still look great from five feet away. Up next: simple electronics, clever fasteners, and transport tricks to keep that shiny prop battle‑ready.
Extras That Elevate: Easy Electronics, Fasteners, and Transport Tips
Little touches turn “nice prop” into “crowd magnet.” Here’s a crash course in inexpensive upgrades that are easy to install, convention‑safe, and don’t require a PhD in wiring.
Blink without a soldering iron
Cheap LEDs + coin cells are magical and painless.

Fasteners that stay put — and come off fast
Make wearables comfortable, adjustable, and convention‑friendly.
Hinges, magnets, and foldables
Small mechanisms allow big convenience.
Travel, comfort, and safety tradeoffs
Avoid last‑minute disasters with a little planning.
Quick project sparks
Next up: the article conclusion — now go make something awesome (and pack it safely!).
Go Make Something Awesome (And Send Photos!)
Pick one small project, dive in, and treat mistakes as free lessons — glue peels, paint drips, and all. Stay safe (mask, ventilation, cut away from yourself), keep costs low by reusing materials, and celebrate each step: mockup, foam cut, painted finish.
Share your progress with the cosplay community for feedback and encouragement — photos, questions, and tiny victories welcome. Now seriously: stop reading, grab a foam sheet or cardboard, and start cutting. We want to see it — send pics, brag, and then start the next one. You’ve got this — creativity beats perfection; now make something magical.


Ok I’m officially buying the Jinx Pow Pow Minigun DIY Cosplay Prop kit after reading this. 😍
Anyone know if it comes with instructions for different scale sizes? I’d like a slightly smaller version for photo ops.
The kit usually has a single size, but you can scale down by reducing barrel length and using thinner PVC/foam cores. I’ll add a mini-scaling quick guide to the article soon.
I resized mine by shortening the central barrel and using thinner dowels. Take care to rebalance the weight if you shorten too much.
Great article overall. A couple of thoughts about the Flexible LED Eye Light Kit for Helmets:
– Please stress heat management and battery placement. LEDs in a closed helmet can get warm, and poor battery placement messes with balance.
– For newbs: recommend a small Li-ion pack with a decent switch instead of tiny button cells — longer runtime and easier to mount.
– Also, mention securing loose wires with fabric tape, not just hot glue (glue can melt if it gets hot).
Thanks! Admin — if you want I can send a quick schematic of my battery mount for the article update.
Once had a helmet LED short because a glue bead cracked — heat shrink + hot glue on top works best for me.
Excellent safety notes, Sophia — we’ll add a safety sidebar in the next edit. Li-ion packs are a great call (with a proper holder and fuse). Also suggest insulating solder joints with heat shrink.
Battery placement = game changer. I put a thin powerbank in a neck pouch and ran a short cable into the helmet. Keeps weight off the head.
That would be amazing, Sophia — appreciate the offer!
This article is a solid intro, but I wish there were more pics of the PVC harnessing and transport tips — transporting big stuff is my nightmare.
I’m curious how folks get full-length PVC props through airlines or into cars without breaking them.
Anyone tried telescoping joints or folding methods?
Also, which glue is best for PVC-to-foam joins?
Telescoping is awesome — I made a staff in 3 sections with internal screw threads. Fits in a suitcase. 😅
I use metal dowels and a couple of velcro straps inside hollow sections. Takes a minute to assemble at the con but super secure.
Thanks all — threading sounds smart. Looking forward to that follow-up, admin!
Good call — definitely planning a follow-up with step-by-step transport hacks. Quick answers: use threaded or slip-fit PVC joints for disassembly; wrap in bubble wrap and tube bags for flights; for PVC-to-foam, contact cement or hot glue with mechanical reinforcement (dowel or screws where possible) works well.
First prop ever: a foam dagger using the SHJADE Mini Hot Glue Gun Craft Kit and some scrap PVC for the handle. The gun is tiny but surprisingly steady for delicate work.
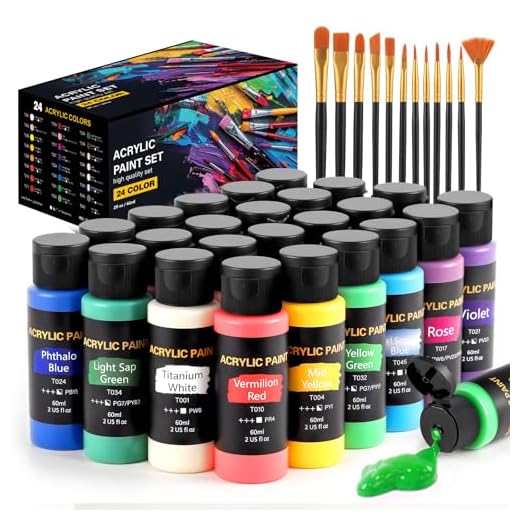
Painted with the 24-Color Acrylic Paint Set — brushes included, so no extra shopping = yay.
Felt proud wearing it at my first local meet!
Love that origin story, Daniel. Tiny glue guns are underrated — more control and less stringing if you use low-temp sticks.
Congrats! Low-temp glue guns are also safer for beginners, which is nice when you’re learning.
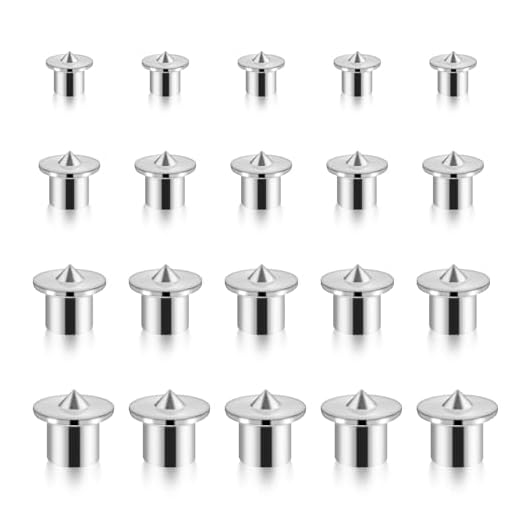
Big fan of the Dowel Centering Pin Set for repeatable builds. Quick question for the community: what’s your go-to method for reinforcing dowel joints in lightweight large props? Epoxy? Screws? Heat-set inserts?
I want something removable but sturdy.
Threaded inserts are my go-to. A small bolt + washer spreads the load better than glue alone.
For removable strength, I like using threaded inserts or T-nuts with machine screws — they let you disassemble and reassemble without wear. For super lightweight, epoxied dowels are fine but not removable.
If weight is a concern, use aluminum hollow tubes with a short screw through into a reinforced foam-core block. Keeps it light and serviceable.
Great tips — I might try inserts for my next build. Thanks!
Cardboard cosplay for life. Cheap, recyclable, and if it rains? Well, enjoy your soggy sword lol 😂
But fr, the cardboard hacks section had some legit ideas. Might try the layered corrugation trick.
True. I once learned the hard way when a rainstorm at a con turned my shield into abstract art 😅
Haha — cardboard has saved many budgets. Pro tip: seal with watered-down PVA or a few coats of Mod Podge for some water resistance.
Cardboard is great but pack it smart when traveling — mold + humidity is real. Use plastic bins if you can.
Totally tried the foam sword tutorial yesterday using the MEARCOOH Black EVA Foam Roll 2mm and wow — so easy!
I layered three pieces, sealed seams with the SHJADE Mini Hot Glue Gun, then drybrushed with the 24-Color Acrylic Paint Set. Turned out way better than I expected.
Tip: heat-gun for gentle curves (low temp) and use a scrap for test paint first.
Also, love that you included the Flexible LED Eye Light Kit — made the helmet look pro without spending a ton.
Thanks for the step-by-step vibe, this is exactly what a newbie needs.
So glad that worked for you, Maya! Your layering idea is a great hack — stacking thin 2mm foam can give you more control over contours than one thick sheet. If you’re doing more curved pieces, try beveling the edges before gluing so seams hide better.
I used a thin coat of PVA glue watered down (50/50) as a primer on the seams, let it dry, then base coat with acrylics. Works like a charm. 😊
Nice! How did you seal the foam before painting? I always worry paint soaks in and looks blotchy.
Really great roundup. I run a small cosplay group and we use a mix of cardboard, PVC, and EVA foam. A couple of bigger points for newbies traveling to cons:
– Invest in a soft case or a broken-down crate with padding for big props.
– Consider disassembly points (bolts/dowels) so your prop fits standard car trunks.
– For painting, do layers in a ventilated area — acrylic fumes + small spaces = nope.
Anyone have recommendations for cheap travel cases or carry-on friendly builds?
Awesome checklist, Hannah — we’ll expand transport tips in the extras section. For cheap cases, people often repurpose golf club travel bags, padded musician cases, or even PVC tube mailers for long rods.
For long items, a mailing tube + foam end caps works wonders for flights. Just disassemble handles if possible.
I use a padded photography gear case for smaller props — you can buy used on marketplaces for pretty cheap.
Thanks y’all — tons of ideas here. Will try the golf bag trick next time 😂
If you’re driving, thrift-store suitcases with extra foam inserts are surprisingly good and budget-friendly.
Super helpful article. I added a tiny mod to the Flexible LED Eye Light Kit — route the wires through a thin channel and hide a tiny USB power bank in a chest pouch. Makes swapping batteries mid-event waaay easier. 😊
Also, 24-Color Acrylic Paint Set with Brushes is perfect — beginners don’t need pro-level paints to get great results.
Agreed — USB banks are lifesavers. Just check voltage/current compatibility with LEDs first.
Love that mod, Ava. USB power banks are a smart workaround for runtime and swapping. We’ll add that to the extras list (and credit you!).
Quick shoutout: Dowel Centering Pin Set 20-Piece Assortment saved me when I was aligning armor plates. Small, cheap, and mad useful. 👌
Love that tip, Liam. Centering pins are underrated for alignment and repeatable assembly — especially when you need removable panels for electronics.
Agreed. I use them with epoxied brass inserts for heavier sections to avoid glued-only joins.
Loved the mini minigun walkthrough — the Jinx Pow Pow Minigun DIY Cosplay Prop looked badass in the pics. Quick q: how heavy do those end up? Would hate to lug a heavy thing all day at a con.
Great question. Weight varies a lot depending on core materials. If you chamber the barrel with cardboard tubes and avoid solid wood cores, you can keep it surprisingly light. Using PVC and foam for bulk keeps weight down but keep an eye on handles — reinforce with a dowel for stability.
I made a similar minigun out of corrugated tubing + foam and it was fine for several hours. Add a shoulder strap if you plan to wear it all day.
Constructive: loved the creative hacks, but the safety section felt a bit thin. Cutting foam with box cutters, working with PVC, and soldering LEDs all need stronger cautions and PPE reminders (gloves, eye protection, proper ventilation).
Also, please add a section on tool maintenance (sharp blades = safer cuts).
Glad to hear it. I can share a quick PPE checklist if you want to include it.
Totally agree, Jacob. Safety is crucial — we’ll beef up the article with clearer PPE recommendations and safe tool-use steps. Thanks for calling that out.
Yes! I cut my finger once — keep spare blades and a cutting mat. Also, use a push-block when possible.
Love the focus on MEARCOOH Black EVA Foam Roll 2mm since it’s affordable, but for full armor pieces I’d recommend thicker foam (4-6mm) or foam clay for details.
Beginners: start with 2mm for patterns and small trim, then graduate.
Curious if anyone’s used 2mm as a sandwich to mimic thicker plates?
I always stack 3x2mm for medium plates and bevel the edges before gluing. Saves money and is lighter than buying one thick sheet.
Yes — sandwiching multiple 2mm layers is a perfect beginner-friendly trick for control and shaping. You can heat-form layers separately then glue for a cleaner curve.